Using "MY DIGITAL STUDIO" ~ My First Card

Why would I want to digitally create a greeting card? Let's see...I could answer:
  • Because I love using my computer to bring my artistic thoughts to life.
  • Because  I want to prove to myself that I can.
  • Because  I want to be able to show others how to do it.
  • Because  I want to add embellishments to my final card.
  • Because IF I decide I want to have my card mass printed, I can.
  • Because I can put away all my supplies in a FLASH, Woo-hooo!
ALL TRUE STATEMENTS!
If I think of any other reasons, I'll let you know.  It's fun to challenge myself and see all the wonderful ideas and the many possibilities.I can make many variations so easily.  I used a stamp design from the set "Always". I used a paper from another digital artist, Christina Bartholomew. It is from her set called Siblings..Background 10.

Here's my card.  This first card is a 4.25 x 5.5 " card because I wanted to keep to a familiar format of my handstamped and punched card art.  You will be seeing three photos.  The front.  The inside greeting portion and the back of the card. I'd love to hear your comments and see some of your digital ideas too.
So-ooo here we are at fourth week of March and I am still recovering from a broken ankle, (it actually has been a month, OMG!)
I am doing what I can to keep busy...it seems there is plenty of time for reflection on all those things I wanted to accomplish. I found an interesting exercise in Real Simple, circa spring 2007 that has me looking at my New Years resolutions. So here is my evidence of progress and my warm-up list for leaving my comfort zone.

try: to write in my blog 4 times a week minimum
see: Vermont in the fall
taste: my foods rather than eat them too quickly...lose weight,tone muscle.
listen: For God's direction in the area of helping other women
visit: Greece, the Greek Isles and Turkey
start: accountability,S.M.A.R.T. Track to Success (well under way, yea!)
stop: saying no for comfort's sake
organize: craftroom... (Yes I am making good progress!)
read: books that I borrowed, then on to those I've added to my library
play: in my painting studio
learn: to let curiosity empower me more than fear holds me back

A Precious Moment

Nothing brings me more joy than being able to watch my children grow, mature, fall in love and then fall in love again as they experience the birth of thier own children! Today my youngest experienced the birth of a son, his second child but you'd have thought it was his first all over again. The wonder, the tender moments of concern for his sweet wife, the fearful moment when they discovered that the baby needed a cesarian birth and finally the amazing pride and joy when he was born.It makes me tear up just thinking about it. I am such a happy grandmother, this is number five and I am still thrilled and awed!
baby,Luke,Ferrier

Bits and Pieces

My dear friend Sarah and my husband have been so sweet to me since I broke my ankle. Not only have they been concerned about helping me with everyday life but they have also been wonderful about making sure I am able to get to keep busy where I can. Sarah has been a huge advocate of making sure I am able to get to my craft supplies, she knows me well ;)Tom helped me get downstairs one day and I pointed out my basic supplies then I remembered I have a drawer marked card components that has grown quite full over the past year. It holds parts and pieces...items that are from an experiment with a background on plain cardstock, or when I've assembly lined a bit more than needed or when I start a card and I find that it isn't working, it gets thrown in that drawer. Well I am quite excited! I have put together quite a few cards in the past week. A side benefit is that I am still on track with cleaning up and reorganizing my little craft heaven...YEA!!

Sharing Healthy Recipes-5

web
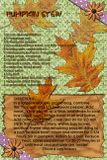
Today I wanted to share another healthy recipe I have enjoyed. The recipe is delicious, I also had great fun creating a digital recipe card for an ongoing recipe swap over at ScrapBook Elements.
Pumpkin Stew
PREP TIME 10 Min
COOK TIME 2 Hrs
READY IN 2 Hrs 10 Min
INGREDIENTS
• 1/2 cup all-purpose flour
• 1/2 teaspoon salt
• 1/2 teaspoon pepper
• 2 pounds beef stew meat, cut into 1 inch cubes
• 2 tablespoons vegetable oil
• 2 tablespoons butter or margarine
• 1 large onion, chopped
• 2 cloves garlic cloves, minced
• 3 medium carrots, thinly sliced
• 2 celery ribs, thinly sliced
• 4 cups water
• 1 bay leaf
• 1 teaspoon beef bouillon granules
• 1 teaspoon dried thyme
• 3 cups peeled, cubed pumpkin

DIRECTIONS
1.In a large resealable plastic bag, combine the flour, salt and 1/4 teaspoon pepper. Add meat, a few pieces at a time, and shake to coat. In a Dutch oven, brown meat in oil and butter. Add onion and garlic; cook and stir for 2-3 minutes. Stir in the carrots, celery, water, bay leaves, bouillon, thyme and remaining pepper. Bring to a boil. Reduce heat; cover and simmer for 1-1/4 hours.
2.Stir in pumpkin. Return to a boil. Reduce heat; cover and simmer for 20-25 minutes or until meat and pumpkin are tender. Discard bay leaves.
Some of my favorite creative expressions have come from using up scraps. Here is a really wonderful idea for using scrap ribbon and then an idea for how to incorporate them into a finished project. Enjoy!

Ribbon Flowers for Scrapbooking - How To Make Ribbon FlowersRibbon Flower Layout

Dig into the your ribbon stash and make these beautiful flowers for your next scrapbook page. Simple, quick stitches and a few supplies are all you need to turn any piece of ribbon into a fabulous flower that you can use to embellish a scrapbook page layout. The ribbon flower shown here has been layered on top of a patterned cardstock flower that was created using one of the cute sketches available on About.com Scrapbooking under Flower-Patterns.


Supplies Needed


To begin, you will want to gather the following simple supplies: 6 or more inches of ribbon, thread, sewing needle, scissors, buttons, and adhesive (double-sided foam adhesive tape, fabric glue, or tacky tape).


Slip Stitch the Ribbon

To get started, thread your needle and fold over the thread so that you have double strength; knot the end a few times to give you a nice big knot on the end. Stitch a running stitch (just in and out) along one edge of the ribbon.


Gather the Ribbon


Once you have stitched a few inches of the ribbon, gently pull the thread as you slide the ribbon down the thread to gather the ribbon. As it gathers it will naturally form a circle. Continue stitching and gathering until you have enough ribbon gathered to complete a circle.


Stitch the Ends of the Ribbon


Once you have a gathered ribbon circle that you like, fold the end of the ribbon back to meet the other end of the ribbon. Pinch these together as you add a few stitches to hold the circle in place and tie off the thread. Use scissors to trim the ribbon right below your stitches to complete the ribbon flower.


Completed Ribbon Flower


When the flower has been stitched, gathered, stitched closed, and trimmed, it will look like this on the front.


Add A Button to the Ribbon Flower


Finish off your flower by adding a button to the center. The button shown here is from EK Success and comes with foam adhesive on the back so that you can just stick it on. Foam adhesive squares, tacky tape, or liquid fabric glue would all work well for attaching the button to the ribbon flower.

St. Patrick’s and Happy Birthday too

Happy St. Patricks Day, May you enjoy all the fun and celebration, I wish you the luck of he Irish and  blessings too. Today is my birthday,yes I’m a St. Patrick’s Day kid! As long as I can remember my birthday has been loads of fun,ok so most folks were celebrating their own holiday, what do kids know!
I woke up to about a million texts on Facebook wishing me a Happy Birthday, what a fabulous day and what a blast. Thank You to everyone for your kind wishes and in sharing my birthday, you’ve made it so special!
I am still wearing my fashionable black cast due to a sledding accident I had on a beautiful snowy day in late February. Yesterday I had a fabulous report from my doctor…just two weeks until I get a walking cast, just in time for my trip to Phoenix. Our son Nathan and wife Lauren are expecting their new little one and we love being  able to be there for this momentus occassion and are thankful for our business freedoms, what an amazing industry we work in.. Also we have two beautiful grandaughters celebrating birthdays. Yes, TWO parties. Both granddaughters are having birthday parties on the same day. 
Have a great day and take a few moments to reflect on how lucky and blessed you are Oh and enjoy this Tradional Irish Blessing I Know I did.  I've added it below my posting. ENJOY!

Traditional Irish Blessing

Sharing Favorite Healthy Recipes-4

CHILE - CHEESE CASSEROLE
1 1/2 c. lite ricotta cheese
1 c. (4 oz.) shredded reduced-fat Monterey Jack cheese
1 (4 oz.) can chopped green chilies, drained
1/2 c. frozen egg substitute, thawed
1/4 c. green onions, chopped
4 (6 inch) corn tortillas
Vegetable cooking spray
1/4 c. green pepper, chopped
1 clove garlic, minced
2 (16 oz.) cans red kidney beans, drained
1 (14 1/2 oz.) can no-salt-added whole tomatoes, undrained & chopped
1 (8 oz.) can no-salt-added tomato sauce
2 tsp. chili powder
1/2 c. (2 oz.) shredded reduced-fat sharp Cheddar cheese
2 tbsp. green onions, chopped
Combine first 5 ingredients in a medium bowl; stir well and set aside. Cut each tortilla into 8 wedges; place on an ungreased baking sheet. Bake at 350 degrees for 10 minutes or until crisp. Set aside.
Coat a nonstick skillet with cooking spray; place over medium-high heat until hot. Add green pepper and garlic; saute until tender. Stir in beans, tomato, tomato sauce, and chili powder; bring to a boil. Reduce heat; simmer, uncovered, 15 minutes, stirring occasionally. Spread half of cheese mixture in a 2-quart casserole coated with cooking spray; arrange 8 tortilla wedges over cheese mixture. Spread half of bean mixture evenly over wedges. Repeat layers with remaining cheese mixture, 8 tortilla wedges and remaining bean mixture. Cover and bake at 350 degrees for 30 minutes or until thoroughly heated. Sprinkle with Cheddar cheese; bake, uncovered, an additional 5 minutes or until cheese melts. Top with 2 tablespoons green onions. Serve with remaining tortilla wedges. Yield: 8 servings
259 calories  Protein 20.5  Fat 6.8  Carbohydrate 30.5  Fiber  3.8/Cholesterol 22  Sodium 359.
Weight Watcher Points - 6 Points

Creativity , "What does it have to do with organizing my scraproom?"

Creativity is spurred in each of us in a myriad of ways. Just do a search on google using the terms creativity, messy and organized. I did, and what I found were folks out in cyberspace each of them postulating thier own way of thinking. To show you what I mean, here are a few quotes I collected in my personal research.
  • "I’d rather refer to it as organized chaos"- Unknown
  • In terms of creativity, messiness juxtaposes things that otherwise would be separated by order. For instance, let’s say you’re writing a proposal and you have many papers and documents on your desk. You can see all the relationships between the different documents and you can combine them in different, creative ways. -Eric Abrahamson on the Benefits of Messiness
  • “messy desks are the vivid signatures of people with creative, limber minds"- Pentelope Green
  • Without this playing with fantasy no creative work has ever yet come to birth. The debt we owe to the play of imagination is incalculable.- Carl Jung
  • Clutter, both mental and physical, can do a number on our productivity and eat away at our time.
  • I used to have a coffee cup that said "A creative mind is rarely tidy." Most of the really creative types I know are actually pretty organized, except when they are in the midst of creating. Then all bets are off!
    Do you enjoy walking in to your craft space when everything is in its place? Is your personal sytle all about being stimulated by the piles of color, tools all thrown about, and project pieces in mini piles here and there? I fall somewhere in between but the best description of me is in the last quote I found. It rings so true... I am actually pretty organized, except when they are in the midst of creating. Then all bets are off!

Sharing More Healthy Recipes-3

Spicy Chicken with Black Beans

POINTS: 8
1 cups uncooked white rice
1 pounds canned tomatoes with green chilies
1 Tbsp olive oil
2 cubes chicken bouillon
1/2 cups onion, chopped
4 oz Kraft Natural Cheese Extra Sharp Cheddar Cheese, shredded
2 cloves garlic cloves, press through garlic press
1 3/4 cups Progresso Black Beans, drained & heated
2 breasts uncooked boneless, skinless chicken breast, cut into bite size pieces
1 bell pepper chopped
Saute Garlic, onion, bell pepper in olive oil, add chicken and cook til no longer pink. in a deep saute skillet Add rice , 3 cups boiling water and bullion cubes. Cook on medium heat until rice is tender approximately 20 minutes. In a serving dish, circle beans around outside edge. Add chicken and rice mixture in the center. Sprinkle with cheddar cheese. Serve.

Sharing More Healthy Recipes-2

I cook ckicken frequently at our home, it is so versatile! Several days ago I prepared this dish for company, some of us were Weight Watchers but everyone was extremely complimentary. I will definately be preparing this dish again.

Lemon Chicken with Broccoli POINTS® Value: 3
Servings: 4
Preparation Time: 10 min
Cooking Time: 10 min
Level of Difficulty: Easy
An easy weeknight dinner. Great with a side of angel hair pasta, rice or couscous...(I used rice.)

Ingredients
2 Tbsp all-purpose flour
1/2 tsp table salt, divided
1/4 tsp black pepper, freshly ground
12 oz uncooked boneless, skinless chicken breast, thinly sliced
2 tsp olive oil
1 1/2 cup(s) fat-free, reduced-sodium chicken broth, divided
2 tsp minced garlic
2 1/2 cup(s) broccoli, small florets
2 tsp lemon zest, or more to taste
Tbsp parsley, fresh, chopped
1 Tbsp fresh lemon juice
Instructions
On a plate, combine 1 1/2 tablespoons of flour, 1/4 teaspoon of salt and pepper; add chicken and turn to coat. Heat oil in a large nonstick skillet over medium-high heat. Add chicken and cook, turning as needed, until lightly browned and cooked through, about 5 minutes; remove to a plate.

Put 1 cup of broth and garlic in same skillet; bring to a boil over high heat, scrapping up browned bits from bottom of pan with a wooden spoon. Add broccoli; cover and cook 1 minute.

In a small cup, stir together remaining 1/2 cup of broth, 1/2 tablespoon of flour and 1/4 teaspoon of salt; add to skillet and bring to a simmer over low heat. Cover and cook until broccoli is crisp-tender and sauce is slightly thickened, about 1 1/2 minutes. Stir in chicken and lemon zest; heat through.
Remove skillet from heat and stir in parsley and lemon juice; toss to coat. Yields about 1 cup per serving.

Sharing Favorite Healthy Recipes

My friend Amber was on the lookout for some healthy recipes, ones that are low in fat and calories and it made me think of some favorites of mine. I thought I'd share the next few days on my blog some of my favorites. I bet Amber would love to have you share your favorites as well. Here is my all time favorite. It has a Mexican flavor, is low in fat and calories and it is YUMMY to boot!
 
 Pace Chicken Bake

 16 oz skinless boneless chicken breasts or tenders
2 cans french style green beens (drained)
16 oz. jar pace picante sauce
2 c. shredded cheddar cheese
2 c cooked rice
My fav method to cook rice is... Bring 3 c water & 2 chicken bullion cubes to a boil. Add 1 c rice, cover. Turn heat to med low and cook for 20 minutes, just watch it to make sure water does'nt evaporate away completely...but don't stir. Test for tenderness, if done take off heat and leave covered 5 minutes. Fluff with fork.

 
Spray a 9x13 pan with Pam spray. Preheat oven to 350 degrees. Drain green beans, spread them out in pan.Layer 2 c. rice on top of beans, then chicken pieces. (I like mine cut into bite sized or chicken tenders size). Pour entire jar of salsa on top of dish. Bake at 350 degrees fo 40 minutes. Sprinkle cheese on top and continue baking until cheese is melted, 5-10 minutes. Makes 8 servings. If following weight watchers the points are 7 points per serving.

Mosaic Resist Birdy

With room on my craft table finally I am able to prepare my ArtXchange group project for January ( a bit late I know). It is a Mosaic and a Resist Technique.

This design is actually a design recreated from an idea my friend Melanie D taught at our recent Stampin Up Hostess Club. Her card used Stampin Up items exclusively of course. My design used an assortment of items I have collected. The bird design is from a clear stamp set and the scroll leafy pattern is from a new SU set Vintage Vogue. Inks are Marvy prussian blue and Versamark ink as well as a soft blue ink between the mosaic cracks. The front of my card is the technique Stained Mosaic Resist. It gives a mosaic look to any stamped design. The “F” friends stamp on the inside of the card is done in another technique, Resist.

Here are the directions for the Stained Mosaic Resist:
Cut leftover scrap rubber into pieces then arrange on a block like a puzzle until you fill the block. I used the adhesive backed rubber that has static cling on the other side such as Ez Mount, and now Stampin Up is also producing static cling stamp sets...Yeaaaaaa! Ok now we are ready to create our card.
  • Stamp an image on a coated light colored cardstock with black ink.
  • Color in any areas you would like.
  • Apply Versamark ink to the mosaic stamp.
  • Stamp over inked and colored design with mosaic stamp inked in Versamark.
  • Emboss with clear powder, tap off excess.
  • Heat embossing powder with heat gun
  • Rub ink pad over image. Buff off exceess ink with a tissue
  • The "lines" between the mosaic will show up. I used light blue.since my image had lots of solid areas . Typically a dark color like black is used.
Resist
Inside my Mosaic Resist Birdy card I wanted to show another type of  resist technique, here is the way I did it.
  • Stamp Friends stamp in Versamark ink.
  • While still wet,  with brayer roll dye ink  over versamark stamped image.
  • Optionally you can also use your heatgun to somewhat dry the image first, then roll over the versamarked image.

Off to the Doctor

The past few days have very interesting indeed! Friends stopping by, stories of others injuries and lots of sage advise to make sure I heal quickly :) I am taking extra calcium/magesium, and definately remembering to take my 3sixty5 nutritionals...I want to have a speedy recovery! Today I found our what my doctors planned to do  about my broken ankle. They took more X-rays and determined I was not going to need surgery...Yea!!! I was offered many colors to pick from for my cast.They had red, blue, purple, yellow, hot pink, camo, soccer ball printed, etc. I picked basic black although Tom wanted to get a custom wrap, LOL. I will be getting better acquainted with Dr.Richey.

Snowing and Sledding and breaks Oh My!

What a glorious day it was. It snowed solidly for nearly 24 hours and when I awoke this morning the sun was out and it was a beautiful winter wonderland...12 plus inches were on the ground and it was spectacular!

My sweetheart was already outside running the snowblower. He hates it when the snow becomes packed and turns to ice so he was busy clearing a safe path to our driveway and sidewalks. I couldn't resist grabbing my camera to capture this lovely white scene.

My friend Sarah & I had the grand idea to go sledding after lunch so my sweetheart Tom grabbed the sleds and went looking for a nice spot in the yard to sled down. We have a hilly yard that leads down to a tennis court so we selected the path that leads down toward the tennis court...a pretty good slope. We have two sleds: a saucer style sled and a long flexible cushion style with side handles...The latter was my choice.

Tom took a test run down our slope.....whoooo-hooooo!!! It looked fun so Sarah grabbed the saucer and away she went! I followed next screaming all the way down, what crazy fun in the middle of a workday. We love being able to rearrange our day to include impromptu events, network marketing is an amazing business to work in :)

Oh yeah, my story.... So we have now each had several crazy, screaming, fun runs down the slope. Toms saucer spun in circles and spit him off to the side once and on his second turn he went face down on the long sled....eeeek! Next Sarah took the saucer and on her turn made it all the way to the tennis court before the saucer bumped on the tennis court pole and she careened around it and off to the right into an open flat area. I grabbed the long sled feet first and headed down the hill again screaming with delight until I realize I'm headed straight for the fence. I stuck out my foot trying to push away from the fence...if I could just manuver around it as Sarah had done on her saucer but not realizing I was going much too fast. My foot slammed in to the fence, pushed the chain link and a foot of snow forward about 8 inches and all of the sudden excruciating pain!! Ohhhhhhhh owwwwwww I... I... I'm going to black out, uuuh., uuummmm uuuhhh....owwwww!

They tried to help me walk up the hill but the pain was so intense I opted to crawl up the hill. Later at the hospital we found out I had managed to break three bones in my foot so I'm pretty sure I avoided a more serious injury. I'm in a splint for a few days and then back in to the orthpedist. I'm hoping to avoid surgery...I'll find out Tuesday .