Finding The Poppies

A number of weeks ago my dear neighbor stopped by out of the blue to see if I had an interest in walking with her on her daily walk. Funny how things work out...I had been thinking it would be so much easier to add activity (ie exercise) to my schedule if I just had someone who wanted to join me.
Her timing  was impeccable!
We began walking a route down to  our local grade school, a 40 minute walk round trip; then every few days we would deviate from the normal route adding a block or more. Well as we walk we share little bits of life, fun stories of other exploits and we often come back to favorite local sites since my walking partner has lived in Alpine, Utah all her life. She is a wealth of information about local fun spots, and such. One place she mentioned was a spot where poppies grow in a field by the remains of an old home...It sounded like a fine adventure to me!
The last week of May on the beginning of one of our walks my friend says, "Should we walk to the Poppies today?" You didn't have to ask me twice, I was excited to "find" this hidden spot!
We headed toward the mountains following Alpine Boulevard until we ran out of road, then continued up the gravel road, all the while my friend kept saying, "I think it's this way". We saw a person up a ways on a mountain bike but missed getting thier attention. A while later we saw a jogger and inquired of her if she knew of the poppies and thier location. Based on her conviction that it was straight up from the church steeple we kept climbing higher. My friend suggested we veer off the gravel road onto a trail and before long again we veered off onto a single file walking trail. By then my companion was seriously doubting the directions we had been given and she called her husband to get better information. Sure enough we had been led astray! Getting re-directed we found ourselves running out of path, and running into rivuets of wetland and now barbwire fencing! Ok, take a deep breath...all is good, at least we know now what direction <sheepish grin>. Ah....finally we see a marker for Poppy Trail...it must be close...and not at all too soon, we were both very hot and tired, The scene before us made the adventure so-ooo worth it! Beautiful!!!


Lambert Homestead & History


It was such a beautiful site I had to bring my sweetheart to see them so about 1 1/2 hours later Tom and I came back together.


Web Ideas, Spiders and Beads??

Hi Friends,

Today I have some free time to myself and of course my love for creating has me thinking of a few really cool ideas.
I love to surf the net to see what others are doing too and so it led me on a search through the topic of printables because I wanted to make a little something for a young friend who just had a birthday. I was thinking something that had his interests and viola! I found a site with Kung Fu Panda images. Don't you just love the web for all the great resources.
Well the idea of printables had me thinking of a fun Ladies Night Out I enjoyed last week I thought it would be fun to create some crafts for another Ladies Night Out. I found some really great sites and a darling template for a popcorn box. I can't wait to try that one out!

LOL no wonder the term web was coined... Ideas  and web surfing really are like a spider web the way they take off. Some are messy and some are very symetrical as you can see. Just take a look at these spider web pictures...don't you agree? 

I'm not really a fan of spiders except that I have come across some very cool ones. In fact I spent money for one of these invaders...cold hard cash! Well today I found a video that shows what I purchased and how you can create your own...well at least a cousin of my find :) I just had to share this idea and  a few other ideas as well.


Owl Always Love You!!

Have you noticed Owls are popping up everywhere in decor...from serious to playful...childrens themes and fit for anywhere and YES I have fallen for them too!

It all started for me last summer while I was shopping with my granddaughter Fiona. We were exchanging sizes and couldn't find the same item. Fiona saw this cute Owl T-shirt..she wanted it - Badly. Odd because it wasn't even in her fav color pink. So after that I noticed me looking at them...especially for children. They are on coin purses, T-shirts, blankets, pillows, banners and even cute bobble bodied figurines.

Now I am even pinning ideas on my Pinterest board with various Owl cards which is what led me to an idea for crafting and owl card for my grandchildren...an Owl Valentine.

After searching a bit it seemed like since I wasn't finding a pattern, would just make my own. It is based off of a clever idea I saw on Sister's Stuff who also was inspired from another idea at Family Fun, LOL.
These are on thier way to my grandkids... each little Owl has a slightly different message on the back.
Heres what I used to make these cute OWL valentines :
  • 4 1/4 x 5 1/2" solid color cardstock (cut one end off  to make it two pieces; 4 1/4 x 4 1/4 and 4 1/4x 1 1/4")
  • 3 1/2 x 4" patterned paper or cardstock
  • 2 scallop die cut outs 1 1/4"
  • 2 circle die cut outs 7/8" white paper
  • 2 circle die cut outs 3/8" black paper
  • 1 triangle yellow paper
  • Vine Street Stampin Up Embossing folder
  • Sizzix Big Shot
  • glitter glue
I curved the bottom corners of my printed paper then centered it on my solid card stock. Using a decorative edged scissor I trimmed a scant edge from the sides of the solid card stock. Apply glitter glue to edge if desired. Glue patterned paper on top of solid, top edge lined up, sides centered.
Next I ran the 1 1/4" x 4 1/4" solid card stock through the Big Shot using the Vine Street folder, (either way is cute). Measure center, cut from center to left diagonally, repeat center to right. Glue to top of patterned paper with point facing down.
For the eyes layer scallop circle, next the larger circle. finally the smaller circle for the pupil. Position the pupils for your preferred expression ;) I think eyelashes might be adorable too...next time ;) Oh....and don't forget the triangle of yellow for your owl's beak. isn't Owl simply adorable!!

Not wanting to spoil the fun for the family I waited to post this until after Valentines Day. You say JUNE??? Well don't you think this design could be ever so clever whipped up in summery colors and themed around fun Owl'y play on words like Owl'ways love your company, "Owl" bet you've been busy, Who-oo wants to come camping? Calling All Night Owls...It's a sleepover! 
I'd love to see your ideas!!


Simply Scored Custom Envelope Tutorial


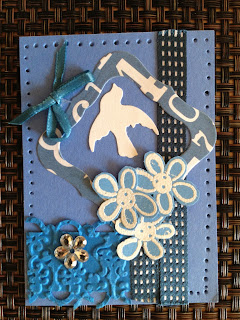
Recently I was creating little pieces of art called ATC's or Artists Trading Cards. This particular project was actually a variation (in that the card itself was an envelope).  A standard ATC is 2 1/2" x 3 1/2"... so-ooo what size paper do I need and where do I find a template? There are quite a few templates available on the web, but still I wondered "How do I determine a custom size?"  I have been busy studying this and today I'm going to show you how it's done... Here we go!
 

Simply Scored™ Custom Envelope Tutorial
You'll need:
  • Simply Scored  scoring board
  • Simply Scored diagonal plate
  • Paper or cardstock
  • card or other rectangular art
  • scissors or 1 1/4 square punch
  • paper cutter or scissors
  • glue to seal envelope
Now just sit back and follow along with the video :)
 
For those of you who may follow along better with written directions here you go!


Set the diagonal plate in position on the score board. Lay your card down in the upper left of the plate so its position is between tick marks (grooves) that show the same measurement at both directions. Example: card is positioned so both corners read 1 3/4".

Determining  size to cut your paper-Next, lay a piece of paper  along the bottom edge of the card aligned with left side of the score board. Note the measurement, add 1/2". That measurement is the size you cut your paper. Example: the card at its bottom edge was  4 1/4" so you would cut the paper 4 3/4" square.


Score narrow side- Lay the card back in position on top of the sized paper (so its position is between tick marks (grooves) that show the same measurement at both directions.) Move one tick mark over and score (1/8" away from card). Repeat with the paper rotated to opposite side.


Score wide side- Reposition card aligning wider side so its position is between tick marks (grooves) that show the same measurement at both directions. Move one tick mark over and score (1/8" away from card). Repeat with the paper rotated to opposite side.


My envelope is cut to fit  my ATC (it was 2 1/2"x 3 1/2").

The measurement when laid on the narrow side was 1 3/4".

When I laid the paper  at the bottom edge of the card the measurement was 4 1/4" so I cut my paper 1/2" larger at 4 3/4").

The measurement when laid on the narrow side was 1 3/4" so I scored it 1 7/8".

The measurement when laid on the wide side was 2 1/2" so I scored it at 2 5/8".

*Watch for a future post on ATCE's or Artist Trading Card Envelopes.


Moving Handmade Card Designs To Your Scrapbooking Layouts

When I first moved to Utah I was amazed at the number of people who were into scrapbooking. My interests were in the paper arts, rubberstamping and cardmaking being the main focus of my attention. Our neighbohood is is a very friendly group and that first week I had many kind people inviting me to sewing groups, hiking and walking groups, and the like. It lead to an invitation to teach my skills to a local group of likeminded women.  I thought on how I could bring together my love of rubberstamping and the paper arts and combine it with the strong scrapbooking influence of the area. What I came up with was an idea to design a rubberstamped card for each class then translate that basic card design into a scrapbook layout. Below are a few examples of the class projects where we did just that...rubberstamped card designs and then similarly I moved those ideas to scrapbooking pages.
Below are several class projects to show you how the whole idea worked out.
Cowboy Up Scrap page Layout


Cowboy Up Scrap page Layout and Card


Embossed Reindeer Card
Snow Much Fun scrap layout
To Our Fathers scrap page and card


My Heritage layout and card design.


SPRING...Green popping up everywhere?!

Green is popping up everywhere! My fruit trees are budded, the chives have erupted, strawberry plants are spreading thier little runners everywhere so WHY oh WHY do we have snow FLURRIES? Here it is May and we have snow flurries! LOL well one thing these little surprises do give me is a bit more desire to sneak down to my craft room to play. Do you wonder where I've been? I've been busy catching up on some recent swap commitments. Just recently we had an unexpected trip out of town that followed our return from our annual Xango Elevation retreat...this year's trip was a cruise to the beautiful Western Carribean. When we headed out of town there was just a faint hint of green in the lawn but coming back the lawn has greened up (aside from the white from the unexpected flurry.) The iris are beginning to bloom, I see sunflower leaflets emerging at my friends house and it just excites me to use some of my flower embellishments I've been stashing since fall :) I wanted to take a
minute to show off some of the things I've been working on.


After all that creating my craftroom has become a huge mess of leftover scraps so most recently I finished some swaps using up some of the leftovers and discards LOL. I've decided I need to do that swap more frequently :)